SPECIFICATIONS & FEATURES
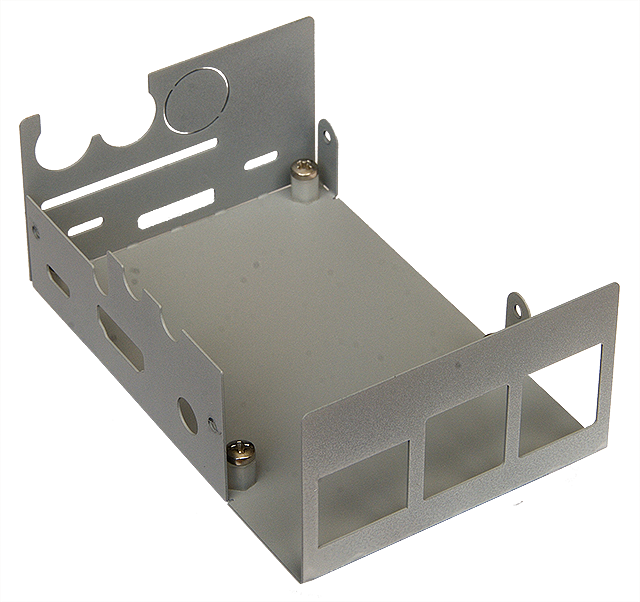
Mount
|
Free standing desktop
|
Material
|
Steel
|
Finish
|
Acrylic
|
Size
|
60 x 35.3 x 92 mm (2.36 x 1.39 x 3.62 in)
|
Size including feet
|
60 x
39 x 92 mm (2.36 x 1.53 x 3.62 in)
|
Weight
|
81 g
|
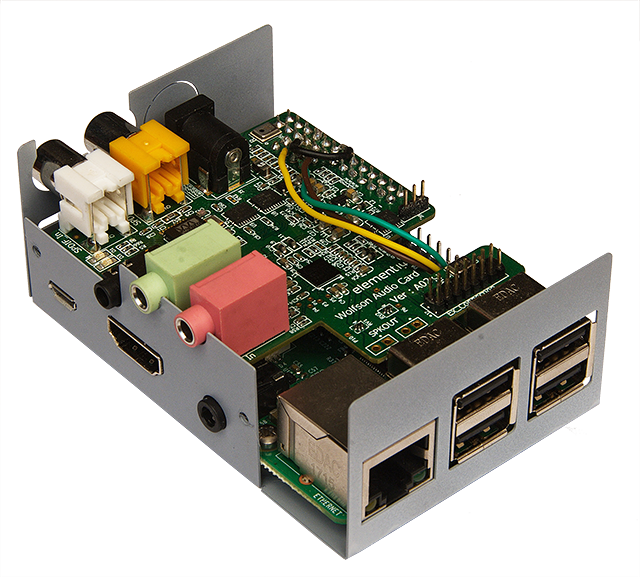
Accessible connectors
|
3.5 mm jacks Headset, Line In, Line Out, RCA jacks
SPDIF In, SPDIF Out, Power (audio card), LAN, USB, A/V, HDMI, Power (Pi)
|
Cape model
|
Wolfson Audio Card
|
Raspberry Pi models(1)
|
Pi 2 model B Pi 3 model B
|
Raspberry Pi attached by
|
M2.5 screws x 4
|
LEDs visible
|
ALL
|
Memory card accessible
|
Yes
|
Opening for display and camera cables
|
Yes
|
Intended use
|
Indoor only
|
|
|
Assembly:
|
1.
|
Open the case and remove all screws;
|
2.
|
Attach audio card to the Pi FIRST;
|
3.
|
Insert left side of
the Pi/Audio card assembly,
where HDMI, USB and audio 3.5 mm jacks are, into the case;
|
4.
|
You may need to pull
GENTLY front wall to let
front USB connectors fit. The front wall
will simply return to its original position
in a spring-like manner assuming that it
wasn’t pulled too far (about 1 mm is enough).
DO NOT use tools!
|
5.
|
Push Pi/Audio card assembly towards left
wall where HDMI, USB and audio 3.5 mm
jacks are;
|
6.
|
Push right side of the Pi/Audio card assembly
(opposite to HDMI, USB and audio 3.5 mm
jacks) down;
|
7.
|
Fix 3 Pi screws. Better do not use 4-th
one, which fells under audio card;
|
8.
|
Close the case and fix 4 cover screws.
|
|
Notes:
|
1.
|
This case is NOT suitable for
Raspberry Pi 1;
|
2.
|
Because case metal is relatively thin, please be careful when
inserting cover screws and do not overtighten them;
|
3.
|
Do not use solvents for cleaning the case as
this can damage the paint finish, use wet cloth instead;
|
4.
|
Indoor use only!
|
5.
|
Color rendition may depend on monitor, camera
settings and lighting, please refer to the
RAL chart to get
a review of the color.
Different colors and further customization are
possible by request;
|
6.
|
Raspberry Pi and Audio card are not included!
|
|
|